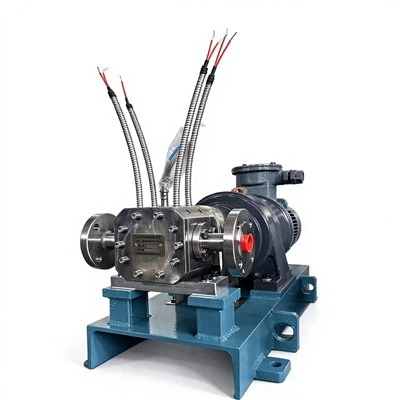
As a supplier of Universal Gear Pumps, I often encounter customers facing issues with damaged pump housings. A damaged housing can significantly affect the performance and lifespan of a Universal Gear Pump. In this blog, I'll share some professional insights on how to repair a damaged housing of a Universal Gear Pump.


Understanding the Universal Gear Pump Housing
Before we dive into the repair process, it's essential to understand the role and structure of the Universal Gear Pump housing. The housing serves as a protective shell for the internal components of the pump, such as gears, bearings, and shafts. It also helps to maintain the pressure and flow of the fluid being pumped. Made from various materials like cast iron, stainless steel, or aluminum, the housing must be strong and durable to withstand the forces and pressures within the pump.
Identifying the Damage
The first step in repairing a damaged housing is to accurately identify the type and extent of the damage. Common types of damage include cracks, dents, holes, and wear on the internal surfaces.
- Cracks: Cracks can occur due to excessive pressure, thermal stress, or mechanical impact. They can be visible on the outer surface of the housing or may require a more detailed inspection using non - destructive testing methods such as dye penetrant or ultrasonic testing.
- Dents: Dents are usually caused by physical impact. They can deform the housing and affect the alignment of the internal components, leading to increased wear and reduced efficiency.
- Holes: Holes can result from corrosion, erosion, or improper installation. They can cause fluid leakage and reduce the pressure - holding capacity of the pump.
- Wear: Wear on the internal surfaces of the housing can occur due to the friction between the gears and the housing. This can lead to increased clearances, reduced volumetric efficiency, and increased noise levels.
Tools and Materials Required
To repair a damaged housing, you'll need the following tools and materials:
- Tools: Welding equipment (if welding is required), grinder, drill, taps and dies, file, calipers, and a torque wrench.
- Materials: Welding rods or filler material (compatible with the housing material), sealant, gaskets, and replacement parts (if necessary).
Repairing a Cracked Housing
If the crack is small and not in a critical area, you may be able to repair it using epoxy resin or a welding process.
- Epoxy Resin Repair: Clean the cracked area thoroughly using a degreaser and a wire brush. Mix the epoxy resin according to the manufacturer's instructions and apply it to the crack. Use a putty knife to smooth the surface and let it cure for the recommended time. This method is suitable for small cracks and non - pressure - critical areas.
- Welding Repair: For larger cracks or cracks in high - stress areas, welding may be required. First, clean the cracked area to remove any dirt, oil, or rust. Pre - heat the housing to prevent cracking during the welding process. Use a welding rod or filler material that is compatible with the housing material. Weld the crack in a series of small passes, allowing the metal to cool between each pass. After welding, grind the welded area to smooth it and restore the original shape of the housing.
Fixing a Dented Housing
If the dent is minor, you may be able to use a hammer and a block of wood to gently tap the dented area back into shape. For more severe dents, you may need to use a hydraulic press or a specialized dent - removal tool. After restoring the shape of the housing, check the alignment of the internal components to ensure proper operation.
Patching a Hole in the Housing
If the hole is small, you can use a plug or a patch made of the same material as the housing. Drill the hole to a suitable size and tap it if necessary. Insert the plug or patch and secure it using a sealant or by welding. For larger holes, you may need to cut a piece of the same material to fit the hole and weld it in place.
Addressing Wear on the Internal Surfaces
If the wear on the internal surfaces of the housing is minor, you can use a fine - grit file to smooth the surface. If the wear is more severe, you may need to re - machine the internal surfaces to restore the proper clearances. This requires specialized machining equipment and skills. In some cases, it may be more cost - effective to replace the housing.
Reassembling the Pump
After completing the repairs, it's time to reassemble the Universal Gear Pump. Clean all the components thoroughly and apply a thin layer of lubricant to the gears, bearings, and shafts. Install the gaskets and seals correctly and tighten the bolts to the recommended torque using a torque wrench.
Testing the Repaired Pump
Once the pump is reassembled, it's crucial to test it to ensure proper operation. Connect the pump to a suitable power source and a fluid supply. Start the pump and check for any leaks, abnormal noises, or vibrations. Measure the pressure and flow rate of the fluid being pumped and compare it with the manufacturer's specifications. If any issues are detected, disassemble the pump again and check the repairs.
Conclusion
Repairing a damaged housing of a Universal Gear Pump requires a good understanding of the pump's structure and the type of damage. By following the steps outlined in this blog, you can effectively repair a damaged housing and restore the performance of the pump. However, if you're not confident in your repair skills, it's always advisable to seek the help of a professional.
At our company, we offer a wide range of Universal Gear Pumps, including the Special Stainless Steel Metering Pump For Resin Sand Mixer, Polyether Polyols Metering Pump, and Gear Metering Pump With High Precision. If you have any questions about our products or need assistance with pump repair, please feel free to contact us for further discussion and potential procurement.
References
- "Pump Handbook" by Igor J. Karassik et al.
- Manufacturer's manuals for Universal Gear Pumps.