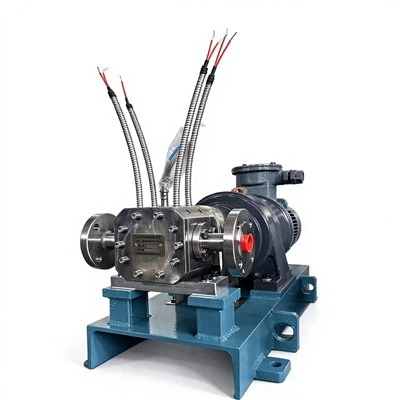
Hey there! I'm a supplier of Magnetic Gear Pumps, and today I'm gonna walk you through the process of replacing the magnetic coupling in a magnetic gear pump. It might seem a bit tricky at first, but with the right steps and a bit of know - how, you'll be able to get it done smoothly.


Why Replace the Magnetic Coupling?
First off, let's talk about why you might need to replace the magnetic coupling. Over time, the magnetic coupling can wear out due to continuous use, exposure to harsh chemicals, or high - temperature environments. When this happens, you might notice a decrease in the pump's performance, like reduced flow rate or increased noise. A worn - out magnetic coupling can also lead to leaks, which can be a real headache, especially if you're dealing with hazardous or expensive fluids.
Tools You'll Need
Before you start the replacement process, make sure you've got all the necessary tools. You'll need a set of wrenches, a screwdriver (both flat - head and Phillips), a torque wrench, a clean cloth, and some lubricant. It's also a good idea to have a container handy to store the small parts you'll be removing.
Step 1: Safety First
Safety should always be your top priority. Before you start working on the pump, make sure it's completely shut off and disconnected from the power source. This will prevent any accidental starts that could cause serious injury. Also, wear appropriate safety gear, like gloves and safety glasses, to protect yourself from any potential hazards.
Step 2: Drain the Pump
Next, you'll need to drain the pump. Locate the drain valve on the pump and open it to let the fluid out. Make sure you have a suitable container to collect the fluid, and dispose of it properly according to local regulations. This step is crucial because you don't want any fluid to spill out during the replacement process.
Step 3: Remove the Pump Cover
Once the pump is drained, use your wrenches to remove the bolts holding the pump cover in place. Carefully lift off the cover and set it aside. Be gentle when removing the cover to avoid damaging any of the internal components.
Step 4: Disconnect the Magnetic Coupling
Now it's time to disconnect the magnetic coupling. You'll likely find some screws or bolts holding the coupling in place. Use your screwdriver or wrenches to remove these fasteners. Once the fasteners are removed, gently pull the magnetic coupling away from the pump. You might need to wiggle it a bit to break the seal.
Step 5: Inspect the Components
While you have the magnetic coupling removed, take a moment to inspect the other components of the pump. Look for any signs of wear, damage, or corrosion. Check the bearings, seals, and impeller for any issues. If you notice any problems, it's a good idea to replace these components at the same time to ensure the long - term performance of the pump.
Step 6: Install the New Magnetic Coupling
Before installing the new magnetic coupling, make sure it's clean and free of any debris. Apply a small amount of lubricant to the mating surfaces to ensure a smooth fit. Carefully align the new coupling with the pump and slide it into place. Make sure it's properly seated and that all the holes line up.
Step 7: Re - attach the Fasteners
Once the new magnetic coupling is in place, re - attach the fasteners using your screwdriver or wrenches. Make sure you tighten the fasteners evenly to avoid any misalignment. Use a torque wrench to ensure that the fasteners are tightened to the manufacturer's specifications.
Step 8: Re - install the Pump Cover
After the magnetic coupling is securely attached, re - install the pump cover. Line up the holes in the cover with the bolts on the pump and carefully lower the cover into place. Use your wrenches to tighten the bolts, again making sure to tighten them evenly.
Step 9: Refill the Pump
Now that the pump is back together, it's time to refill it with fluid. Close the drain valve and use a funnel to pour the fluid into the pump. Make sure you fill it to the appropriate level, as indicated in the pump's manual.
Step 10: Test the Pump
Once the pump is filled, reconnect it to the power source. Turn on the pump and let it run for a few minutes. Listen for any unusual noises or vibrations, and check for any leaks. If everything seems to be working properly, you've successfully replaced the magnetic coupling in your magnetic gear pump!
Related Products
If you're in the market for high - viscosity pumps, we've got some great options for you. Check out our Jacket High Pressure High Viscosity External Gear Metering Pumps, High Viscosity Rotor Pump, and High Viscosity Pump. These pumps are designed to handle tough applications and provide reliable performance.
Contact Us for Purchase
If you have any questions about replacing the magnetic coupling or if you're interested in purchasing a new magnetic gear pump or any of our high - viscosity pumps, don't hesitate to get in touch. We're here to help you find the right solution for your needs.
References
- Manufacturer's manual for the magnetic gear pump
- Industry best practices for pump maintenance and repair