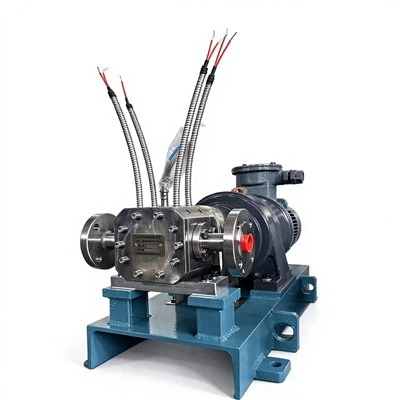
As a trusted supplier of Gear Metering Pumps, I understand the critical importance of correct installation for ensuring optimal performance and longevity of these precision devices. In this blog post, I will guide you through the step-by-step process of installing a gear metering pump correctly, sharing insights and best practices based on my years of experience in the industry.
Pre-Installation Preparations
Before you start the installation process, it is essential to conduct a thorough inspection of the gear metering pump and all associated components. Check for any signs of damage or defects during transportation, such as dents, scratches, or loose parts. Ensure that all the necessary accessories, including gaskets, seals, and mounting hardware, are included and in good condition.
Next, carefully review the pump's installation manual provided by the manufacturer. This manual contains detailed instructions and specifications specific to your pump model, such as the recommended mounting orientation, inlet and outlet connections, and torque values for fastening bolts. Familiarize yourself with these guidelines to avoid any installation errors that could compromise the pump's performance.
Select an appropriate installation location for the gear metering pump. The location should be clean, dry, and well-ventilated, away from sources of heat, moisture, and vibration. Make sure there is enough space around the pump for easy access during installation, operation, and maintenance. Additionally, ensure that the surface where the pump will be mounted is flat and level to prevent misalignment and excessive stress on the pump components.
Mounting the Gear Metering Pump
Once you have completed the pre-installation preparations, it's time to mount the gear metering pump. Start by positioning the pump on the mounting surface according to the recommended orientation specified in the installation manual. Use a spirit level to ensure that the pump is perfectly level in both the horizontal and vertical directions.
Align the mounting holes on the pump base with the holes on the mounting surface. Insert the mounting bolts through the holes and hand-tighten the nuts to hold the pump in place. Do not fully tighten the nuts at this stage, as you may need to make minor adjustments to ensure proper alignment.
Use a torque wrench to tighten the mounting bolts to the recommended torque values specified in the installation manual. Over-tightening the bolts can cause damage to the pump base or the mounting surface, while under-tightening can result in loose connections and vibration during operation. Make sure to tighten the bolts evenly in a crisscross pattern to ensure uniform clamping force.
Connecting the Inlet and Outlet Pipes
After mounting the gear metering pump, it's time to connect the inlet and outlet pipes. Start by cleaning the pipe ends and the pump ports to remove any dirt, debris, or burrs. This will help to ensure a tight and leak-free connection.
Apply a thin layer of thread sealant or Teflon tape to the male threads of the pipe fittings. This will prevent leakage and ensure a secure connection. Insert the pipe fittings into the pump ports and hand-tighten them. Use a pipe wrench to further tighten the fittings, but be careful not to over-tighten them, as this can damage the threads or the pump ports.
Connect the inlet pipe to the pump's inlet port. The inlet pipe should be sized appropriately to ensure adequate flow rate and minimize pressure drop. Make sure the inlet pipe is free from any restrictions or obstructions, such as bends, valves, or filters, that could impede the flow of fluid.
Connect the outlet pipe to the pump's outlet port. The outlet pipe should also be sized appropriately to handle the pump's flow rate and pressure. Make sure the outlet pipe is properly supported to prevent stress on the pump and the pipe connections.
Electrical Connections
If your gear metering pump is electrically powered, you will need to make the necessary electrical connections. Start by turning off the power supply to the installation area to prevent electrical shock.
Identify the electrical terminals on the pump motor. Refer to the motor's wiring diagram or the installation manual for the correct wiring connections. Use appropriate electrical cables and connectors that are rated for the voltage and current requirements of the pump motor.
Connect the power cables to the motor terminals, following the wiring diagram. Make sure the connections are tight and secure. Use electrical tape or wire nuts to insulate the connections and prevent short circuits.
Ground the pump motor to prevent electrical shock. Connect the grounding wire to the grounding terminal on the motor or the pump frame. Make sure the grounding connection is solid and meets the electrical safety standards.
Priming the Pump
Before starting the gear metering pump, it is essential to prime the pump to remove any air from the pump and the piping system. Priming ensures that the pump can start smoothly and operate efficiently.


Fill the pump and the inlet pipe with the fluid to be pumped. This can be done by opening the vent valve on the pump or the piping system and allowing the fluid to flow in until it overflows. Close the vent valve once the pump and the inlet pipe are filled with fluid.
Start the pump and let it run for a few minutes to circulate the fluid and remove any remaining air from the system. Monitor the pump's operation and check for any signs of leakage or abnormal noise. If you notice any problems, stop the pump immediately and troubleshoot the issue.
Testing and Commissioning
After priming the pump, it's time to test and commission the gear metering pump. Start by checking the pump's rotation direction. The rotation direction should be as specified in the installation manual. If the pump is rotating in the wrong direction, reverse the electrical connections to the motor.
Gradually increase the pump's speed and pressure to the desired operating conditions. Monitor the pump's performance, including the flow rate, pressure, temperature, and vibration. Make sure the pump is operating within the specified parameters and that there are no signs of leakage or abnormal noise.
Check the pump's lubrication system, if applicable. Ensure that the lubricant level is correct and that the lubrication system is functioning properly. Follow the manufacturer's recommendations for lubrication intervals and lubricant type.
Perform a final inspection of the pump and the piping system. Check for any signs of leakage, loose connections, or damage. Make any necessary adjustments or repairs before putting the pump into full operation.
Conclusion
Installing a gear metering pump correctly is crucial for ensuring its optimal performance and longevity. By following the steps outlined in this blog post, you can install your gear metering pump safely and effectively. Remember to always refer to the manufacturer's installation manual and follow the recommended procedures and specifications.
At our company, we offer a wide range of high-quality gear metering pumps, including the Strong Water Delivery Special Gear Metering Pump, Alkali Phenolic Resin Special Metering Pump, and Rotary Gear Pump. Our pumps are designed and manufactured to meet the highest standards of quality and reliability, and we provide comprehensive technical support and after-sales service to ensure your satisfaction.
If you are interested in purchasing a gear metering pump or have any questions about the installation process, please feel free to contact us. Our team of experts will be happy to assist you and help you find the right pump for your application.
References
- Manufacturer's Installation Manuals
- Industry Standards and Guidelines for Pump Installation
- Electrical Safety Codes and Regulations