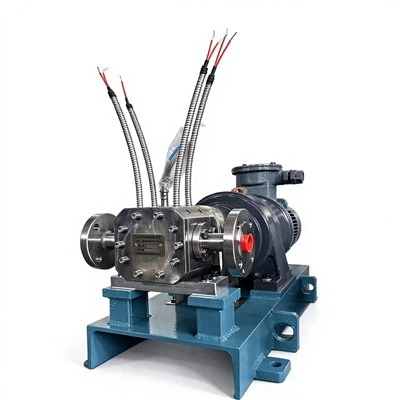
Hey there! As a supplier of Plastic Gear Pumps, I've gotten a ton of questions about how to install a seal in these pumps. It's a crucial step that can really make or break the performance of your pump, so I'm gonna walk you through the whole process.
First off, let's talk about why the seal is so important. The seal in a plastic gear pump plays a key role in preventing leaks. If you've got a leaky pump, it can lead to all sorts of problems, like reduced efficiency, damage to other parts of the system, and even safety hazards. So, getting the seal installed correctly is super important.
What You'll Need
Before you start the installation process, you'll need to gather a few tools and materials. Here's a list of what you'll typically need:


- A new seal that's compatible with your plastic gear pump. Make sure to check the specifications of your pump to get the right size and type of seal.
- A clean work surface. You don't want any dirt or debris getting into your pump during the installation.
- A set of basic hand tools, like wrenches and pliers.
- Some lubricant. This will help the seal slide into place more easily and prevent damage during installation.
Step 1: Prepare the Pump
The first step is to prepare the pump for seal installation. Start by turning off the power to the pump and making sure it's completely depressurized. You don't want any pressure in the system when you're working on it.
Next, remove the pump from the system. This might involve disconnecting some hoses or pipes, so be careful and make sure you keep track of where everything goes. Once the pump is out, clean it thoroughly. Use a mild detergent and a soft brush to remove any dirt, debris, or old sealant from the pump housing.
Step 2: Remove the Old Seal
Now it's time to remove the old seal. Use your pliers or a seal removal tool to gently pry the old seal out of its groove. Be careful not to damage the pump housing or the sealing surface while you're doing this. If the old seal is really stuck, you might need to use a little heat to soften it up. You can use a heat gun or a hair dryer on a low setting to warm up the seal.
Once the old seal is out, inspect the sealing surface for any damage or wear. If there are any scratches or nicks, you might need to repair or replace the pump housing. A damaged sealing surface can prevent the new seal from forming a proper seal, which can lead to leaks.
Step 3: Install the New Seal
Before you install the new seal, apply a thin layer of lubricant to the sealing surface and the inside of the seal. This will help the seal slide into place more easily and prevent damage during installation.
Carefully place the new seal in the groove, making sure it's properly aligned. Use your fingers to press the seal into place, starting at one end and working your way around the groove. Make sure the seal is fully seated in the groove and there are no gaps or wrinkles.
If the seal is a split seal, you'll need to align the two halves carefully and make sure they fit together properly. Some split seals come with a special alignment tool to help you with this.
Step 4: Reassemble the Pump
Once the new seal is installed, it's time to reassemble the pump. Start by reconnecting any hoses or pipes that you disconnected earlier. Make sure all the connections are tight and there are no leaks.
Next, reinstall the pump in the system. Make sure the pump is properly aligned and secured in place. You might need to use some bolts or clamps to hold the pump in place.
Step 5: Test the Pump
After you've reassembled the pump, it's time to test it to make sure the seal is working properly. Turn on the power to the pump and slowly increase the pressure. Check for any leaks around the seal or the pump housing. If you see any leaks, turn off the pump immediately and check the seal installation. You might need to remove the seal and reinstall it if it's not seated properly.
If the pump is working properly and there are no leaks, congratulations! You've successfully installed a seal in your plastic gear pump.
Additional Tips
- When choosing a seal for your plastic gear pump, make sure it's made from a material that's compatible with the fluid you're pumping. Some fluids, like Acetic Acid Pump Gear Metering Pump, can be very corrosive and require a special type of seal.
- If you're using a PEEK Material Positive Displacement Pumps, make sure the seal is also made from a PEEK-compatible material. PEEK is a very strong and durable material, but it can react with some types of seals.
- For extremely corrosive acids and chemical liquids, you might need an extremely corrosion resistant acids chemical liquid gear metering pump with a special seal. These pumps are designed to handle harsh chemicals and require a seal that can withstand the corrosive effects of the fluid.
Conclusion
Installing a seal in a plastic gear pump might seem like a daunting task, but if you follow these steps and use the right tools and materials, it's actually a pretty straightforward process. By taking the time to install the seal correctly, you can ensure that your plastic gear pump will operate efficiently and reliably for years to come.
If you have any questions or need more information about plastic gear pumps or seal installation, don't hesitate to reach out. We're here to help you find the right solutions for your pumping needs. Whether you're looking for an Acetic Acid Pump Gear Metering Pump, a PEEK Material Positive Displacement Pumps, or an extremely corrosion resistant acids chemical liquid gear metering pump, we've got you covered. Contact us today to start the procurement negotiation process and get the best deals on high-quality plastic gear pumps.
References
- Pump Installation and Maintenance Manuals
- Seal Manufacturer's Technical Guides
- Industry Standards and Best Practices for Pump Sealing