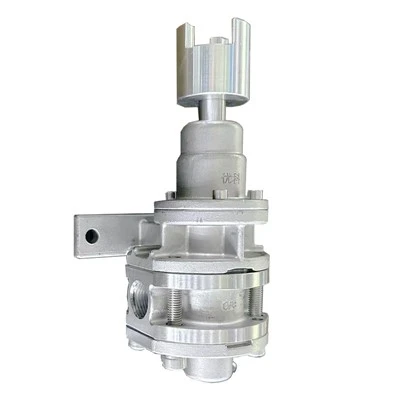
If you’ve ever worked with fluid transfer systems—whether in food and beverage processing, chemical manufacturing, or pharmaceutical production—chances are you rely on CAM rotor pumps. These workhorses handle viscous, shear-sensitive, or abrasive fluids with remarkable consistency, but like all precision equipment, they need regular maintenance to keep running at peak performance. The most common (and critical) maintenance task? Replacing the pump’s seals. As a CAM rotor pump supplier with over a decade of hands-on experience helping manufacturers avoid unplanned downtime, I’ve seen firsthand that skipping this step or doing it incorrectly can lead to leaks, product contamination, and even full pump failure. Today, I’m walking you through the step-by-step process of replacing CAM rotor pump seals, complete with pro tips I’ve learned from supporting hundreds of customers across industries.
Before we dive into the work itself, let’s talk about why seal replacement is non-negotiable for CAM rotor pumps. Unlike centrifugal pumps that use impellers, CAM rotor pumps rely on closely fitting rotors rotating inside a housing to move fluid. Seals—typically mechanical seals or lip seals, depending on your pump model—are the only barrier between the process fluid inside the pump and the external environment. Over time, seals degrade from exposure to harsh chemicals, extreme temperatures, or even regular wear and tear during continuous operation. A failing seal can lead to fluid leaks, which not only create safety hazards or mess in your facility but also risk contaminating your product batch. For example, a food and beverage customer I worked with once delayed a full production run because a leaking seal on their CAM rotor pump tainted a batch of syrup, costing them tens of thousands of dollars in wasted material and missed deadlines. That’s why paying attention to seal condition and replacing them at the first sign of wear is so important.
First, let’s cover the pre-replacement preparation. Rushing into disassembly without the right tools or precautions is a surefire way to damage your pump or injure yourself. Start by shutting down your system completely and disconnecting the pump from its power source. Lockout/tagout (LOTO) procedures aren’t just a best practice—they’re a must to prevent accidental startup while you’re working. Next, drain all remaining fluid from the pump housing and flush it thoroughly with a compatible solvent (make sure it’s approved for use with your process fluid and pump materials) to remove any residual product or debris. This step reduces the risk of exposure to hazardous materials and keeps your work area clean.
Now, gather your tools and parts. You’ll need basic hand tools: socket wrenches, screwdrivers, a seal puller (or a small screwdriver and pry bar if you don’t have a puller—just be careful not to scratch the pump housing or rotor shafts), a torque wrench for reassembly, and a soft cloth for cleaning. Most importantly, double-check that you have the correct replacement seals for your specific CAM rotor pump model. Using the wrong size or material can lead to immediate failure. For example, if you’re handling polyurethane adhesives, a standard rubber seal won’t hold up to the chemical properties of the material. In that case, a precision pump designed for that application—like our Polyurethane Adhesive Universal Gear Metering Pump—uses seals engineered to resist those specific chemicals, making seal replacement straightforward when you use the right parts.
Once you’re prepared, it’s time to disassemble the pump. Start by removing the pump from its mounting brackets and disconnecting the inlet and outlet piping. Label each component as you remove it—this will save you hours of frustration when reassembling later, especially on complex pumps. Next, remove the end caps of the pump housing, taking note of the orientation of any shims or spacers between the end caps and the housing—these control the rotor clearance, which is critical for pump performance. Gently pull the rotors out of the housing (use a soft cloth to avoid scratching the rotor surfaces, which can cause leaks or uneven wear) and set them aside on a clean, flat surface.
With the rotors out, you can access the old seals. Most CAM rotor pumps have two seals: one on the drive shaft side and one on the idler side. To remove the mechanical seals, use your seal puller to grip the outer edge of the seal and pull it straight out. If you’re using a screwdriver, insert it carefully under the seal edge, taking care not to damage the seal seat inside the pump housing or the shaft. Old lip seals will often pop out easily once you pry the edge, but again, be gentle. After removing the old seals, clean the seal seats and shaft surfaces thoroughly with a lint-free cloth and a mild solvent. Remove any buildup, rust, or scratches—even a tiny burr can cause a new seal to leak. If you notice deep scratches on the shaft, you may need to polish it or replace the shaft entirely; don’t skip this step, as it will ruin your new seal quickly.
Now, for the critical part: installing the new seals. Before you put anything in place, lubricate the outer edge of the new seal and the shaft with a compatible lubricant. For most pumps, food-grade grease or the same process fluid you’ll be pumping works well—avoid using oil that could contaminate your product. Align the seal squarely with the seal seat, making sure it’s oriented correctly (most seals have a mark or part number side that faces outward toward the end cap). Gently push the seal into place by hand, then use a seal installation tool (or a block of wood that’s slightly smaller than the seal outer diameter) to tap it evenly into the seat. Don’t hammer directly on the seal—this can crack the seal or misalign it. You want the seal to sit flush with the housing, not recessed or protruding. If you notice the seal is off-kilter, remove it and start over; a misaligned seal will leak every time.
Once both seals are installed, it’s time to reassemble the pump. This is where your earlier labeling will pay off. Place the rotors back into the housing, making sure they’re oriented correctly (your label will tell you which rotor goes where—rotors have specific notches or directions to maintain clearance). Reinstall the shims or spacers in their original positions—these control the gap between the rotors and the housing, which is usually specified in the pump’s manual. If you don’t have a manual, a good rule of thumb is to set the gap to around 0.001 inches (0.025 mm) for most standard pumps, but always consult your model’s specifications. Next, reattach the end caps, tightening the bolts in a crisscross pattern to ensure even pressure—this prevents the housing from warping and causing seal leaks. Don’t over-tighten the bolts, either; that can also damage the end caps or seals. Follow the torque specifications in your manual, or start with a gentle 10 ft-lbs and adjust as needed.
After reassembly, you can remount the pump to its piping, but before you connect the power, perform a static leak check. Fill the pump housing with clean water or your process fluid and let it sit for 30 minutes. Check around the seals and piping connections for any leaks. If you spot a leak, don’t panic—most of the time it’s due to a minor misalignment or a loose bolt. Tighten the end cap bolts slightly in a crisscross pattern and check again. If the leak persists, you may need to remove the seal and reinstall it, making sure it’s sitting flush and aligned.
Once the static check passes, it’s time for a test run. Start the pump at low speed first and gradually increase to operating speed. Monitor for unusual noise, vibration, or leaks during the first 30 minutes. If everything runs smoothly, you’re good to go. If you notice any issues, shut down the pump immediately and inspect your work—common mistakes include misaligned seals, incorrect rotor clearance, or over-tightened end caps.
A few pro tips from my team to make this process even smoother: First, always keep spare seals on hand. The last thing you want is to wait for a replacement seal mid-production, leading to costly downtime. As a pump supplier, we recommend that our customers stock seals specific to their operating models, especially if they run 24/7 operations. Second, consider the material of your seals based on your application. For example, if you’re working with extrusion materials, our Extrusion Gear Metering Pump uses seals that withstand the high temperatures and pressures common in extrusion processes, so seal replacement is simpler when you choose the right pump for your needs. Third, if you’re working with corrosive chemicals, invest in pump components made from materials like carbon steel. Our High-quality Carbon Structural Steel Gear Metering Pump For Furan Resin, for example, is designed to handle aggressive chemicals, reducing seal degradation and the frequency of replacements.
Seal replacement doesn’t have to be a daunting task. With the right preparation, tools, and parts, you can get your CAM rotor pump back up and running in an hour or less, avoiding unplanned downtime that hits your bottom line. At the end of the day, regular seal maintenance isn’t just about fixing a leak—it’s about keeping your production line moving, protecting your product quality, and extending the life of your pump.
If you have questions about which seals work best for your specific pump or application, or if you’re looking for a reliable CAM rotor pump that’s built for easy maintenance and long-lasting performance, our team is here to help. We offer a range of pumps tailored to different industries and needs, from precision metering pumps like the Polyurethane Precision Gear Metering Pump to heavy-duty units for continuous operation. Reach out to our team to discuss your requirements and find the right solution for your business.
References


- ISO 10479:2015, Rotary pumps – Capacity (volumetric flow rate) and performance testing
- Hydraulic Institute, Pump Seal Maintenance Best Practices, 2022
- CAM Pump Manufacturing Technical Manual, 2021 Edition
- American Gear Manufacturers Association (AGMA), Gear Pump Selection and Maintenance Guidelines, 2020